Introduction
This guide documents the design, fabrication, and assembly of a custom-built Diver Propulsion Vehicle (DPV) — a lightweight, modular, and efficient underwater scooter engineered for recreational diving and marine exploration.
The DPV project merges mechanical design, marine robotics, and electrical integration into a single, cohesive engineering build. It serves as both a functional underwater vehicle and a demonstration of applied systems engineering from CAD modeling to propulsion testing.
Design Overview
Purpose:
To develop a compact, neutral-buoyant DPV capable of propelling a diver or swimmer efficiently while maintaining high maneuverability and safety.
Key Design Features:
Weight: ~8 lbs (in air)
Max Speed: ~1.5 m/s (≈ 3 knots)
Runtime: 45–80 minutes (depending on throttle use)
Construction: Sheet metal frame + 3D-printed components
Control: Waterproof rotary throttle with magnetic kill switch
Power: Modular lithium-ion battery pack (4S or 6S)
Mechanical Design
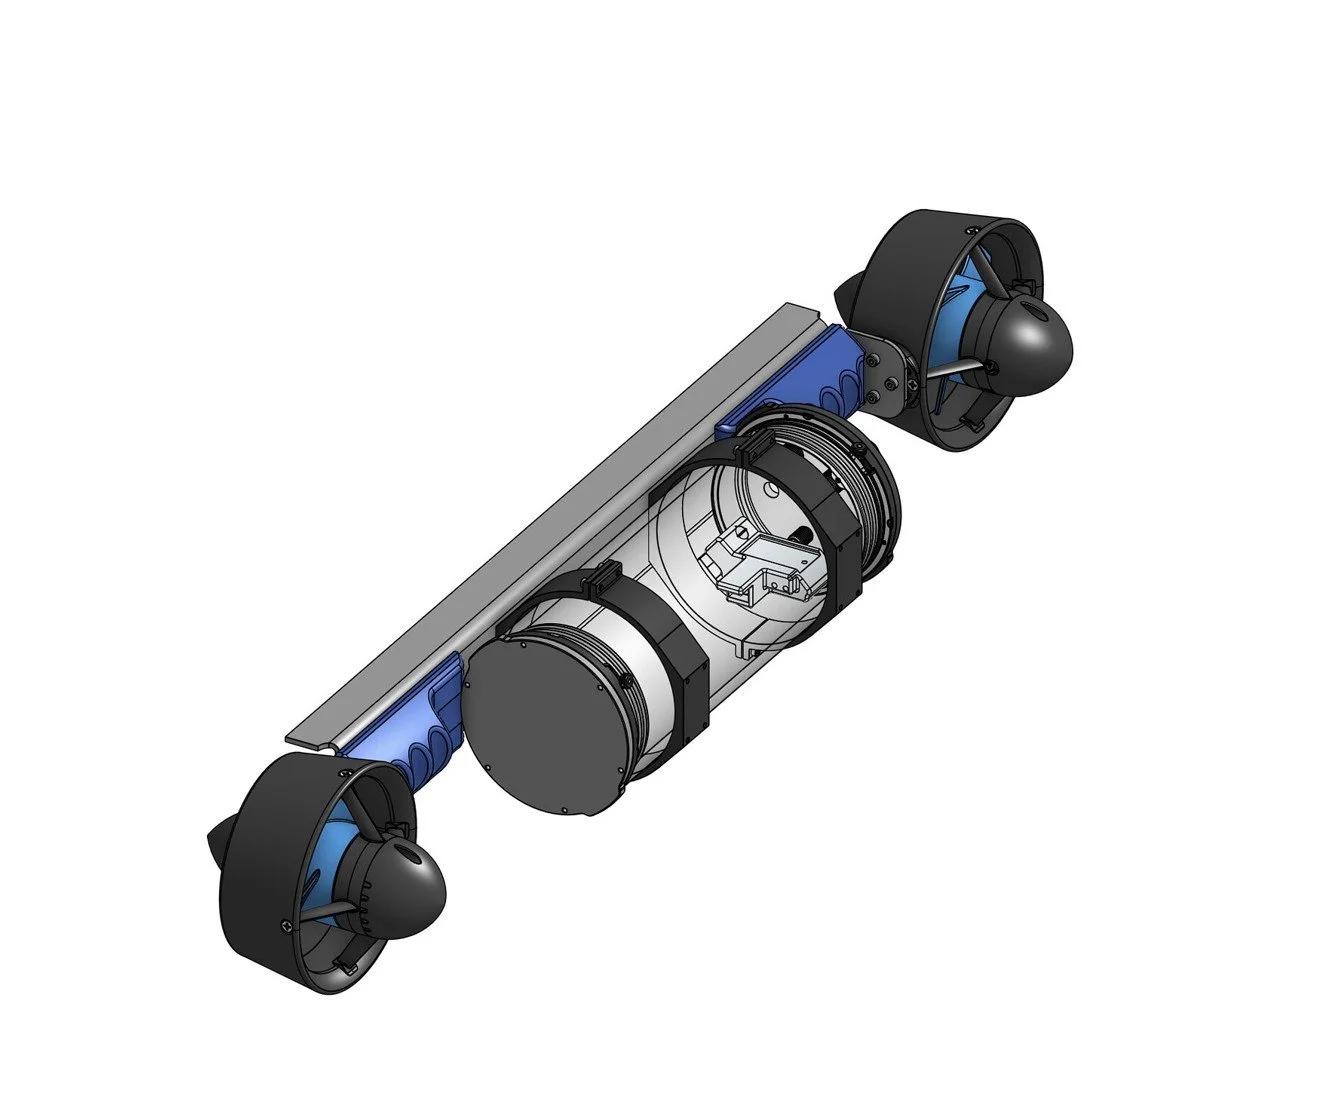
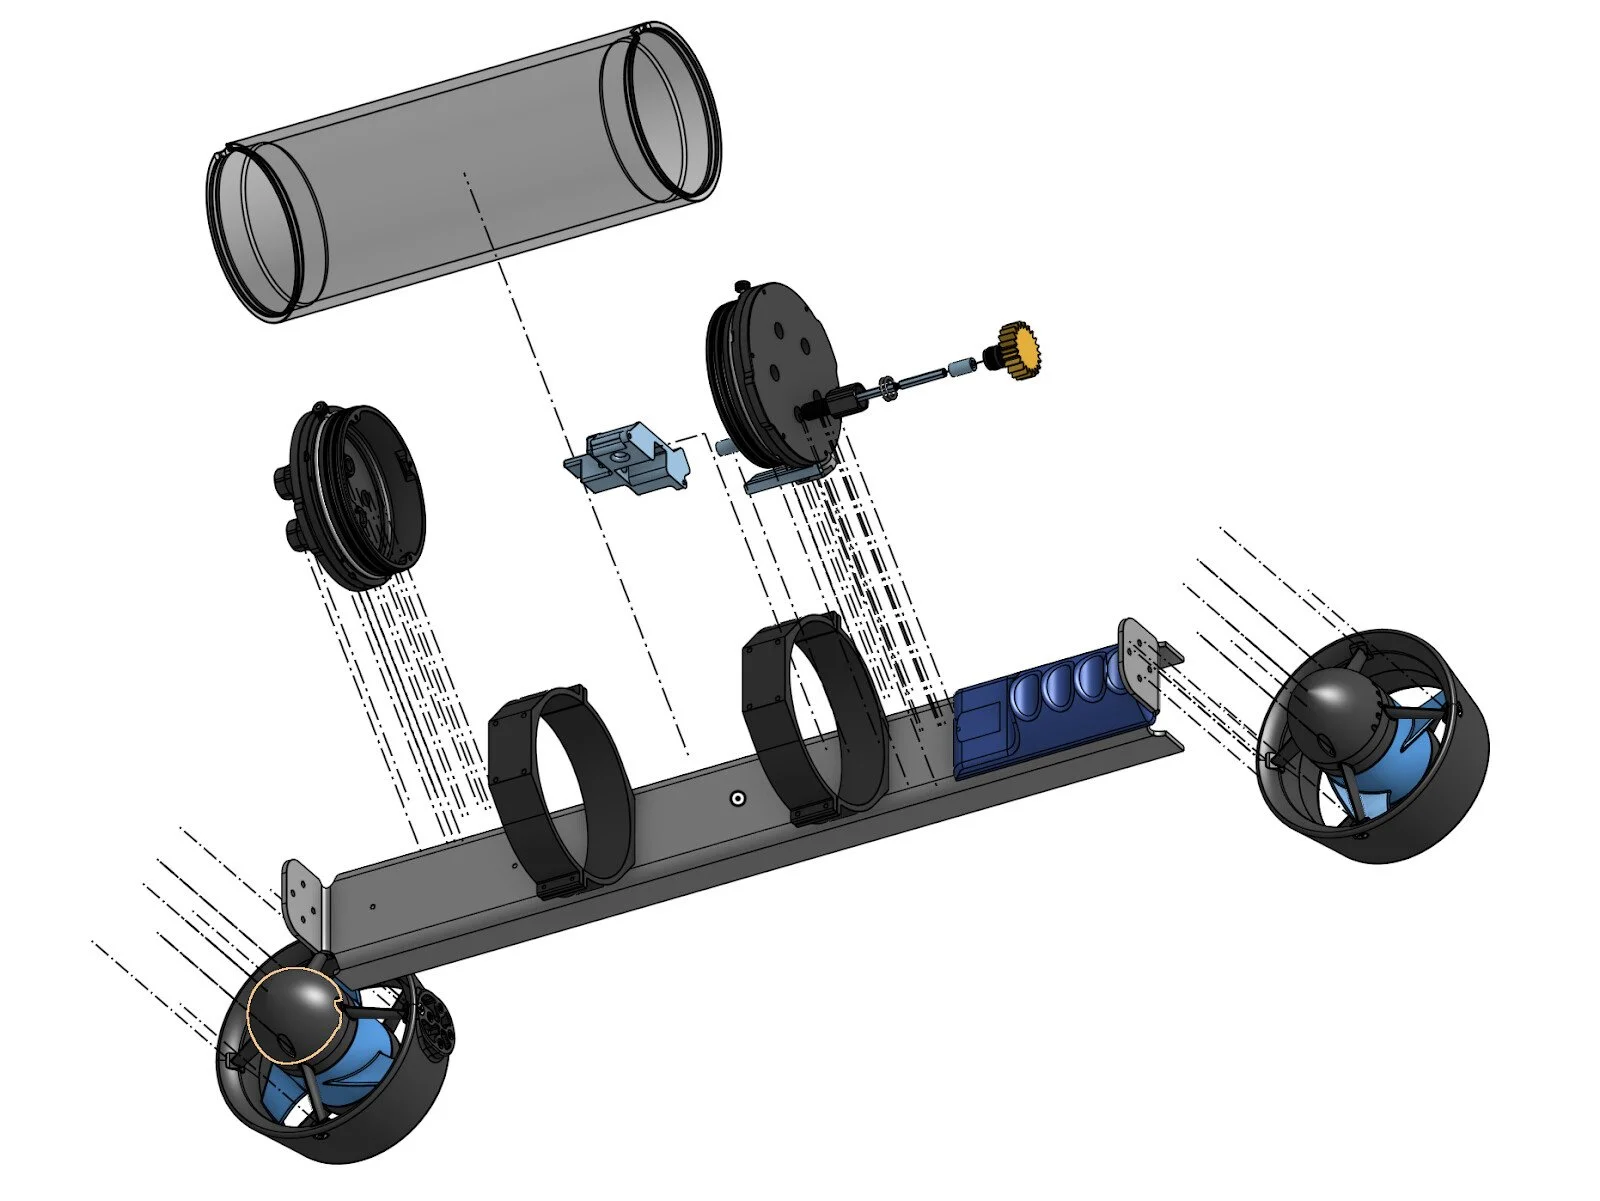
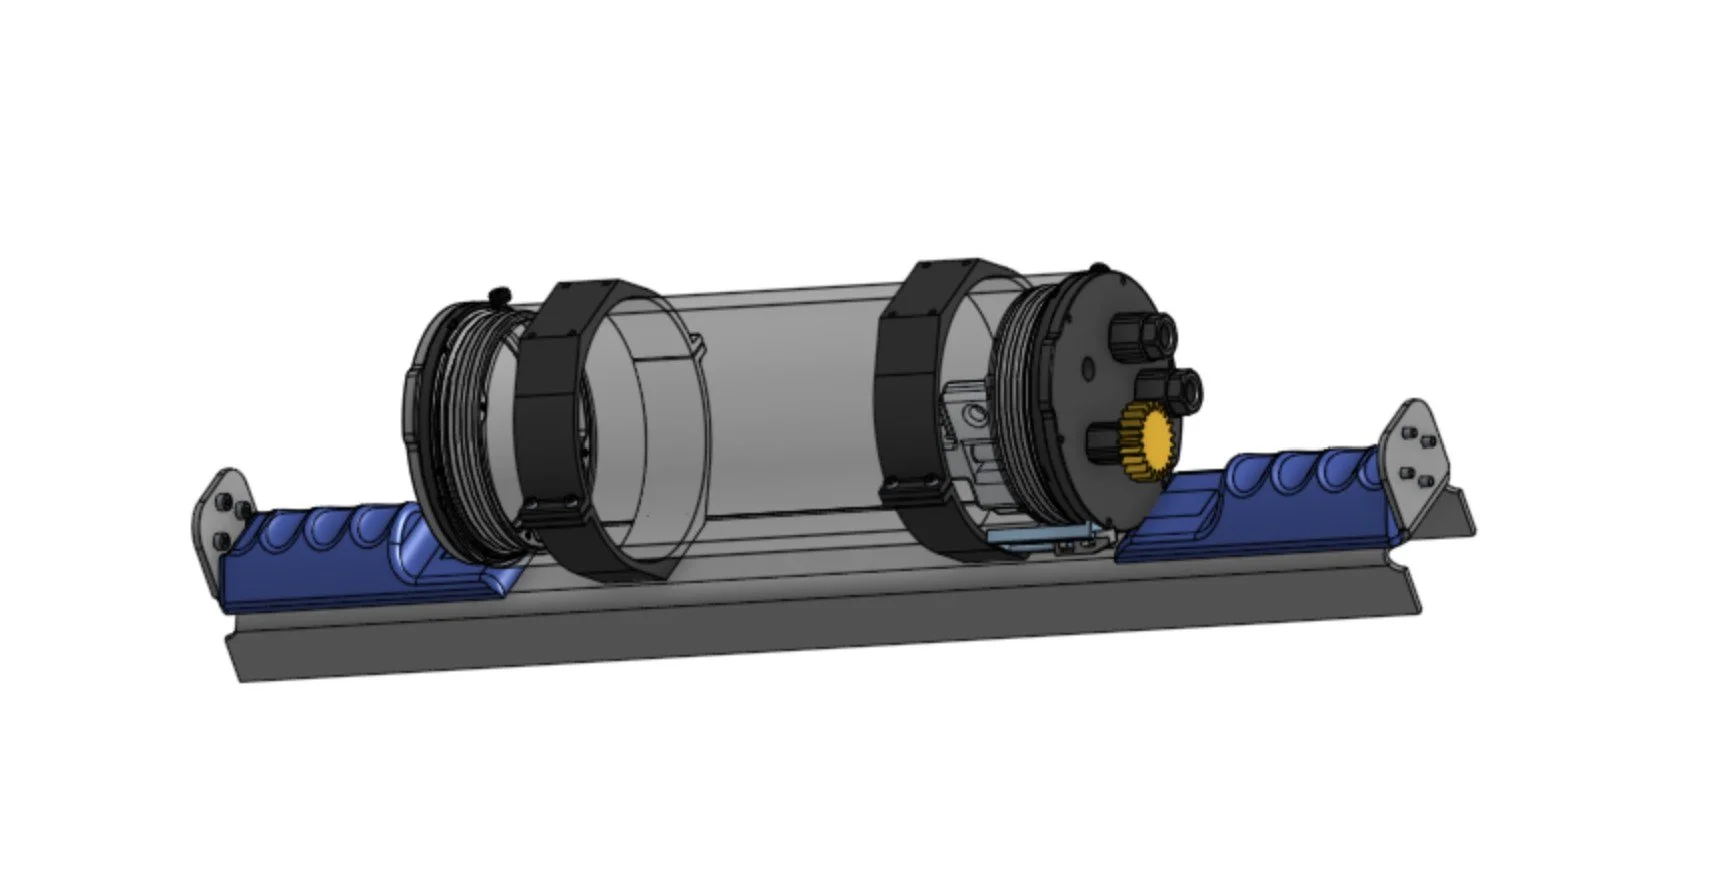
The frame evolved from a T-slot aluminum structure into a single folded aluminum chassis, which integrates the thruster mounts and enclosure supports.
Core Components:
Main Frame: 5052-H32 aluminum sheet, folded into a cross-bar assembly.
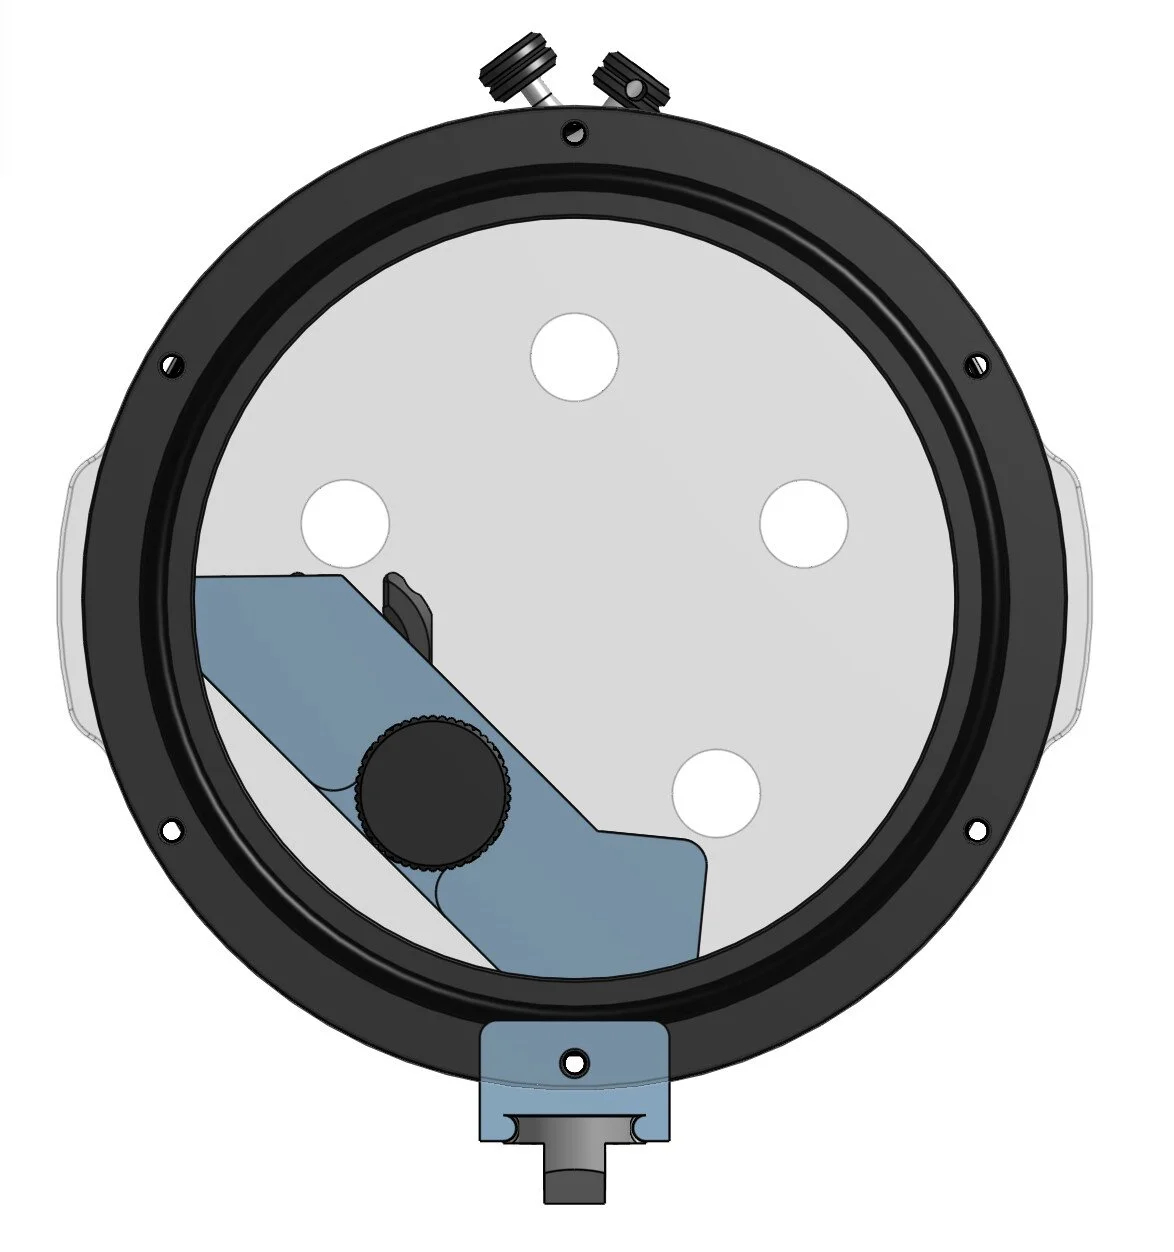
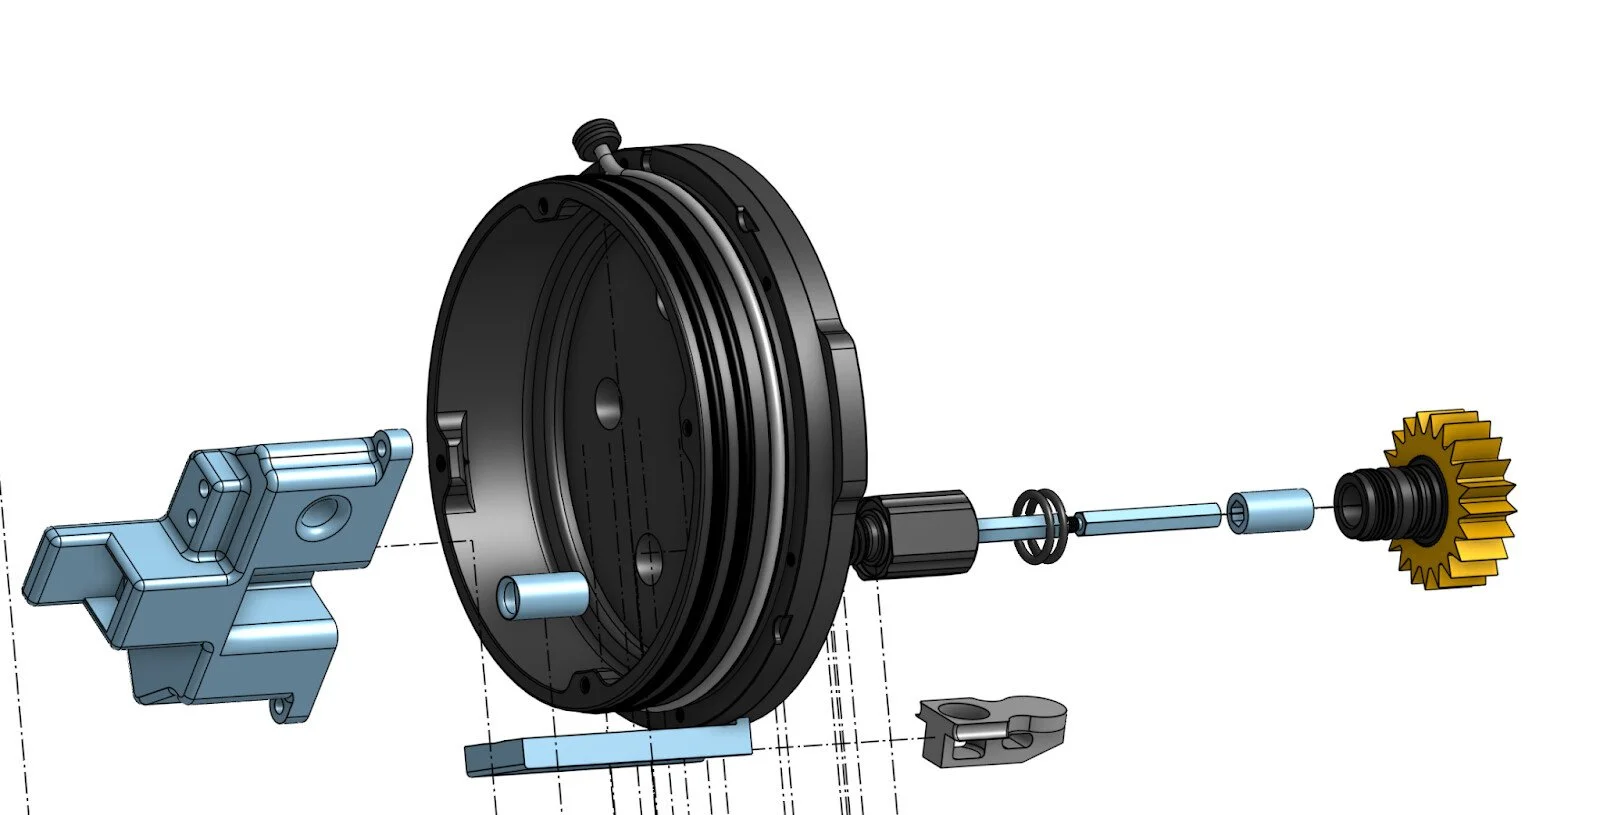
Enclosure: 4-inch acrylic or polycarbonate tube, sealed with dual O-ring flanges.
Handles: Ergonomic 3D-printed PLA+ grips, directly mounted to the frame.
Mounting Hardware: M3/M4 stainless bolts throughout, with printed alignment fixtures.
Design Software:
Modeled in SolidWorks, with all files available for iterative refinement and customization.
Manufacturing Methods:
FDM 3D printing (PLA+, PETG for structural parts)
CNC-machined aluminum coupling rings
Laser-cut sheet metal frame
Propulsion & Electrical System
Thrusters:
Dual Flipsky thrusters are used for balanced thrust. Props are mounted counter-rotating (CW/CCW) to cancel torque.
Electronics Layout:
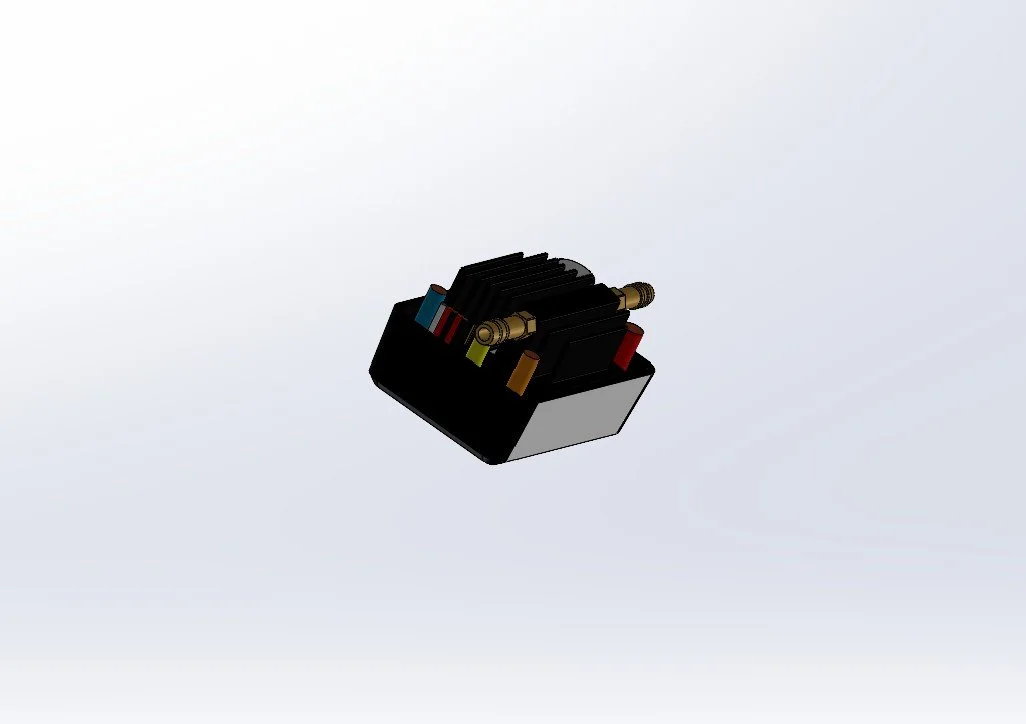
ESCs: 2 × BasicESC or BasicESC 500 modules
Controller: Thruster Commander with potentiometer input
Kill Switch: Magnetic reed switch (lanyard-mounted safety cutoff)
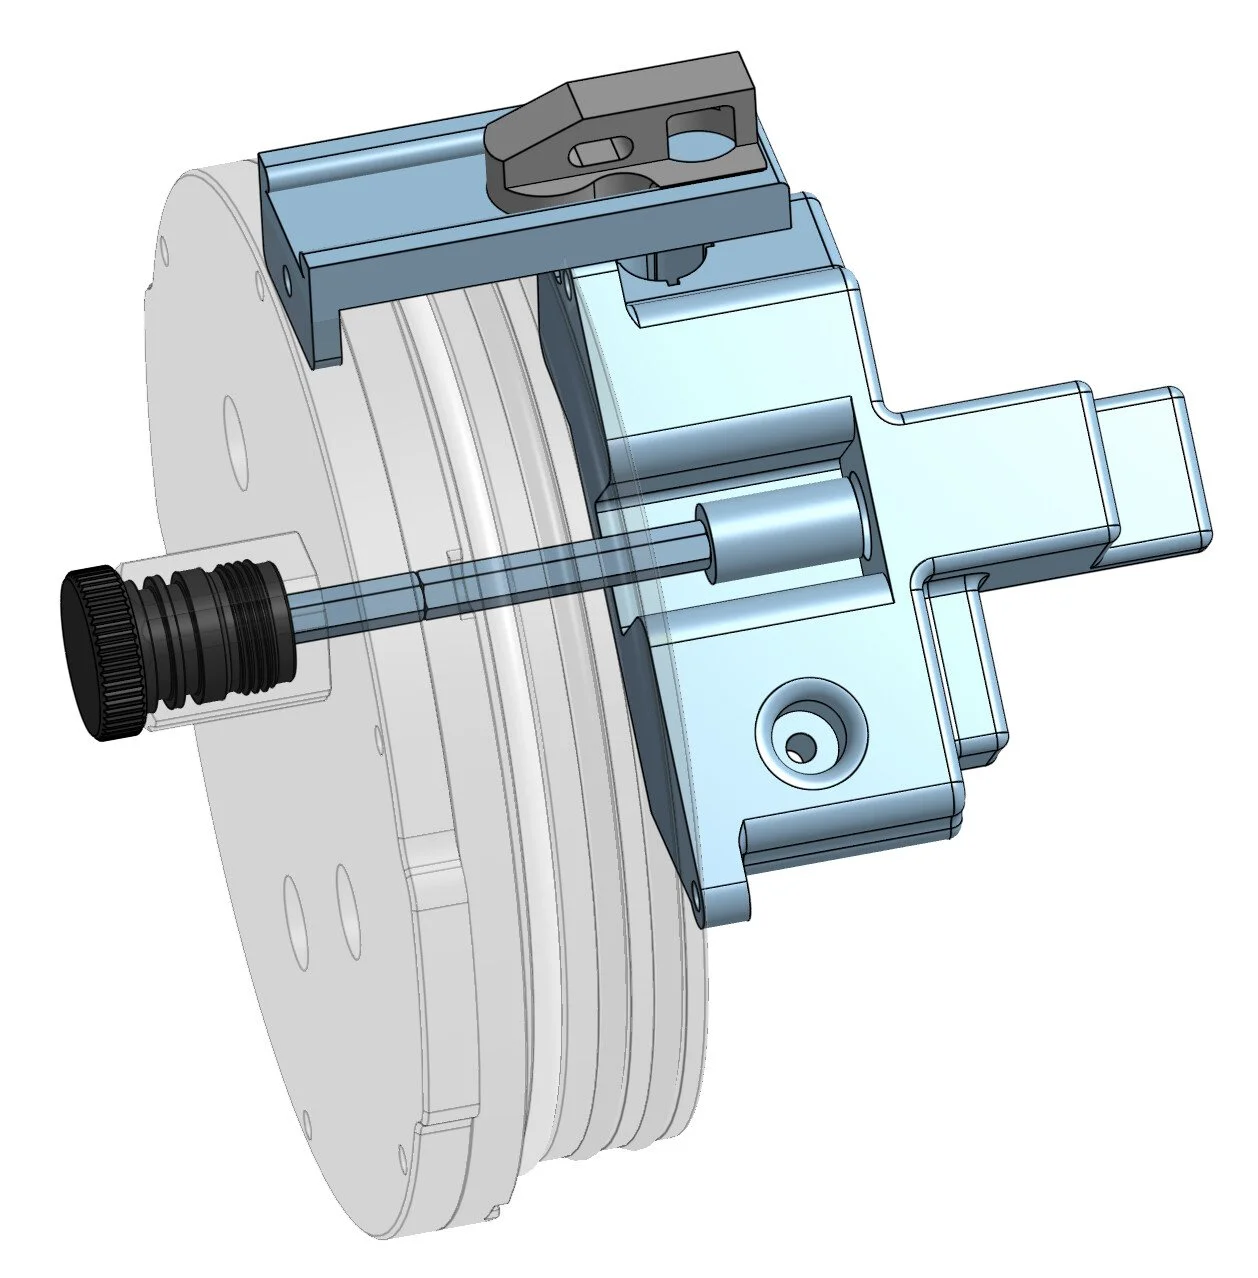
Throttle: Waterproof rotary dial with mechanical coupling
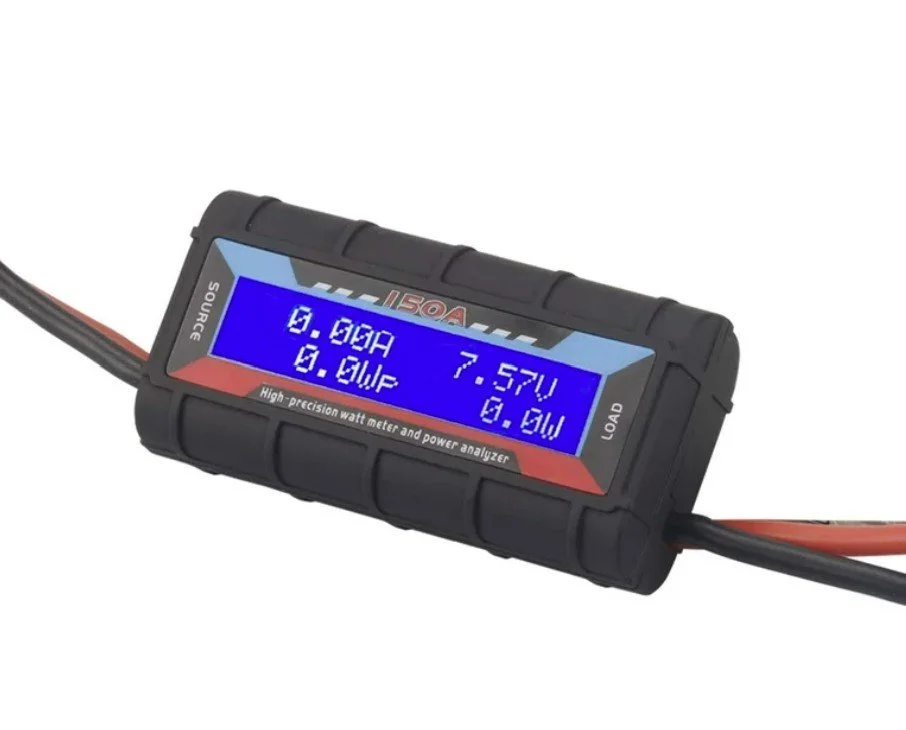
Power Monitor: Inline volt/amp meter for battery tracking
Safety Controls:
Magnetic kill-switch automatically disables power when released.
Soft-start throttle logic prevents sudden torque spikes.
Fused battery input for circuit protection.
Wiring Summary:
10 AWG power lines to bus bar → ESCs → Thruster Commander
XT90 connectors for modular battery swaps
Waterproof penetrators (M10–M14) for cable management
Battery & Power Management
Battery Configuration:
4S 18Ah or 6S 22Ah lithium-ion pack
XT90 or XT60 quick-disconnect terminals
Inline power meter with total mAh tracking
Estimated Endurance:
Low-speed cruise (125–250W): 60–80 minutes
High-speed (~700W): 20–30 minutes
Voltage Safety:
Stop use when pack drops near 13V (4S) or 19.5V (6S)
Never discharge below 12V (4S) or 18V (6S) to prevent cell damage
Assembly Procedure
Mount Components
Attach thrusters to frame (props facing inward/upward for torque balance)
Secure enclosure clamps to frame
Install hand grips and hardware
Prepare Enclosure
Mount Thruster Commander and potentiometer assembly
Wire ESCs and bus bar connections
Integrate reed switch and throttle dial coupler
Seal endcaps with O-rings, apply silicone lubricant
Install Electronics
Route thruster cables through M14 penetrators
Connect ESCs → Commander → Power meter → Battery
Test kill switch functionality
Final Integration
Compress O-ring seals, insert locking cords
Calibrate throttle range and kill switch engagement
Mount enclosure to frame clamps securely
Testing & Calibration
Pre-Dive Testing:
Verify thruster rotation direction (pushing away from frame)
Confirm ESC initialization tones
Ensure reed switch disengages motor on removal
Check voltage and mAh before submersion
Pool Validation:
Start at low throttle to observe thrust direction and buoyancy
Adjust ballast/foam to achieve neutral buoyancy
Conduct 10–15 minute endurance tests before open water trials
Safety Guidelines
Always use a buddy system when diving.
Avoid running thrusters out of water.
Never insert fingers or tools near propellers.
Remove magnetic kill switch before handling propellers.
Monitor voltage during use; do not exceed depth ratings of enclosures.
Avoid sand or silt near thrusters to preserve coatings.
Performance Goals & Future Improvements
Target Metrics:
Speed: 3–4 knots
Runtime: 45–60 minutes
Depth Rating: 30+ meters (testing phase)
Future Enhancements:
6S high-output power system for increased thrust
Integrated PCB for throttle and telemetry
Improved ergonomic hand grips
Mounting points for GoPro or navigation lights
Smart BMS with Bluetooth telemetry
Project Reflection & Purpose
This DPV project exemplifies the practical integration of mechanical, electrical, and marine design disciplines. It represents a holistic approach to hands-on marine engineering, blending rapid prototyping, materials testing, and safety-critical design in one platform.
Authored by: Colby Vreman
Project: Vreman 3D Lab — Diver Propulsion Vehicle Initiative
Status: Ongoing Development (In-Water Testing & Optimization)